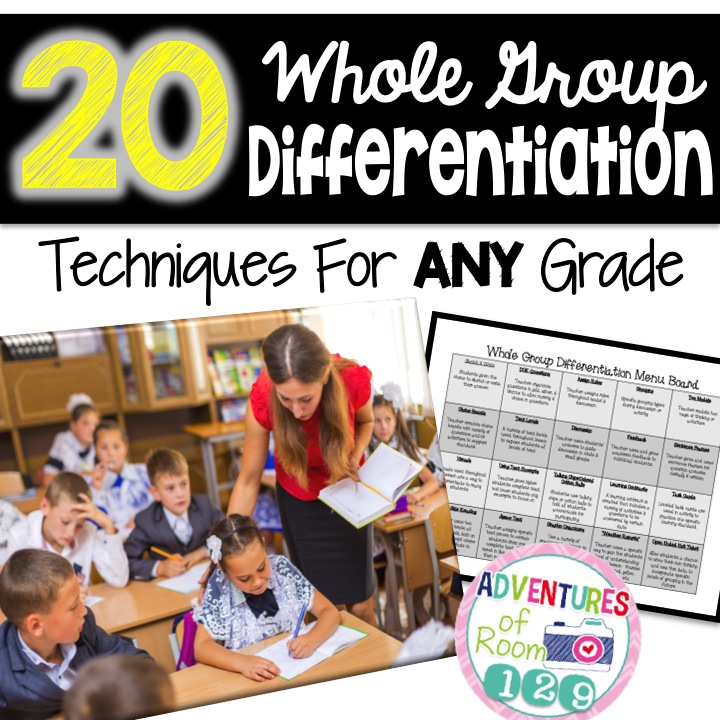
20 Whole Group Differentiation Techniques for ANY Grade!
Crap.. I said a bad word!! We all know, as teachers, that the ‘D’ word is one of the most feared words in education. Yes, we all know its a must do – but it truly is one of the hardest elements to incorporate into your every day classroom routine and lessons. Many teachers feel more comfortable differentiating (eek! I said it again) when the students are in small groups. That seems and feels like the most natural way to differentiate, and rightfully so! But what about when the class is together in whole group? Whether we like it or not that has to happen at some point in our day. So I’ve gathered 20 different whole group differentiation techniques that can be applied to any classroom, any grade, and any subject! There’s a printable copy of all of these ideas at the bottom of the post. I have mine printed and in my teaching binder so I can refer to it when writing my lesson plans and sometimes even when I’m teaching! I hope you can find one or two that you’ve never tried! 🙂
#1: Sketch & Write
After asking a question, give the students a choice on whether they want to write their answer in a sentence (or two) OR if they want to sketch out their answer. This gives the students a little more freedom and takes the pressure off of those who don’t like to write. Make sure though, that everyone gets a chance to explain their drawing to check for accuracy!
#2: DOK Questions
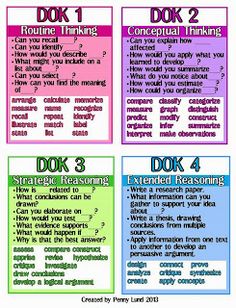
You’ve all probably heard of Blooms Taxonomy – but the ‘new’ up and coming questioning technique is asking a variety of DOK (Depths of Knowledge) questions. There are 4 different levels. Most elementary classrooms will be asking mostly level 1 & 2 with a push for level 3. Upper grades need more level 3 & 4. DOK is different from Blooms because Blooms is all about the verb. DOK is what you do AFTER the verb. Here’s a quick visual for reference. If you want more info on DOK, let me know! By asking a variety of DOK questions during your whole group time, you can easily differentiate for each of your learners.
#3: Assign Roles
During your model and core teaching, assign a few students with specific roles or jobs that they have to accomplish by a certain point in the lesson. I usually think of the students that I know will either struggle paying attention OR those that will or have been struggling on a specific part of this concept. These roles can be as simple as “Brandon, I want you to watch me model and when I’m done, tell me what the first thing I did was.” This gives Brandon a specific thing to be watching and listening for! It could also be a question you want a student to answer. Example: “Carrie, when I’m done modeling I want you to tell me what the word product means.” Giving these roles can be very powerful!
#4: Grouping
This is one you probably already do well in practice. Grouping during whole group for small discussions can help bring those lower level students out of their shell when talking with others either on their own level, or talking to those above them. This can be done in a turn and talk or a stand up – pair up technique. But get them talking!
#5: Two Models
One of the most important pieces of a strong lesson is the teacher’s model. This is when the teacher shows the students the thinking behind how to solve the problem in front of them. This thinking is usually done on the level of the students that you’re modeling for. But if you have a variety of levels in your room for the model – it isn’t fair that you cater to one level or the other. So why not do two models!? Start by modeling something more on or below level. Then give those specific students a task to practice that concept with a partner back at their desk for 3-4 minutes. Then with everyone who is left with you, do another quick model but with a harder problem. Then send them back to their seats to practice for 3-4 minutes. During this time you can check in on the first group you sent back and now you’re all ready to move more into the lesson.
#6: Choice Boards
Choice boards are very simple to make and very fun for students to complete. On the board you can have a variety of tasks, problems, or even questions about a specific text in reading, science, or social studies. You can even go as far as labeling the difficulty of each box. Let the students know that these boxes are easy, these are doable, and these are harder. Then guide them as you walk around to which boxes they should probably be completing.
#7: Text Levels
This example works best when working on a unit or nonfiction type topic. For example: Let’s say you’re studying Dr. Martin Luther King. In the unit, expose the students to a variety of text levels regardless of their level. Use an excerpt from a more difficult text and an excerpt from an easier text and require that all readers use all levels of text for their activity or question. Exposure to all levels of text is a great way to show students what’s out there and where they can be striving for as a reader. This can work in math too with exposing them to a variety of difficulty in the types of questions and problems. It is OKAY to ask a question that only maybe 1-2 students in the class can answer. That is great exposure for them!
#8: Discussion
Again, this is one you all probably use on a daily basis – but it has so much potential to be a truly powerful differentiation tool. A good teacher will use the discussion coming from the back and
‘forthness’ of questions and answers between teacher and students or students and students to help guide where their conversations with each person go. Discussions can be very differentiated if the teacher is receiving the data back from the students correctly and responding appropriately.
#9: Feedback
This idea goes right along with #8. Giving academic feedback to a student is a wonderful and easy way to differentiate for each student individually even when whole group. When a student gives an answer – the teacher’s response needs to be academic based as opposed to just ‘good job’ or ‘you’re right!’. We are all guilty of it and yes, we can say that sometimes, but to get a true discussion the teacher needs to respond to a student’s answer with appropriate academic based feedback. So for example if a student, when asked what’s the main idea of the article, says “I think the main idea is about how penguins survive in the winter.” The teacher would respond with “Excellent, how do you know that?” (Making them justify their answer). The student would say, “I know this because throughout the text the headings all referred to penguins and they all had the same topic in common of everything they do to survive in the winter.” This is where academic feedback can be powerful. Instead of saying “Good job” and move on – validate that student’s thinking not only for them, but for the rest of the class to hear. Teacher would say “I love how you were able to find those commonalities throughout the headings of the article and use them to find the main idea. That’s a great reminder to use those text features when trying to find what the entire article is about.” In those two sentences you’ve validates that child but also TAUGHT the class how to find main idea. Feedback is powerful!
#10: Sentence Frames
Sentence Frames are an easy way to help differentiate for the lower level students when being asked to verbally or write a written answer to a question. This allows the student to do more of a ‘fill in the blank’ but still left to fill in the most important parts of the question as well as have a model to format their answer both verbally and written.
#11: Visuals
Such a fun and easy way to differentiate – use visuals throughout the lesson you’re teaching. Remember though, that it is important to teach the students HOW to anchor their learning to the visual. You can’t just have it up and expect the students to use it. In your model, show them when it is appropriate to use it and how it can be helpful. This can help any level of learner!
#12: Using Text Excerpts
This is a grand idea to help all learners feel included in on a discussion of a specific text. Find a text that meets more of your higher level of students and from that, find an excerpt or two and cut those out. This is what you will give to your lower level of students. Your discussion and questions will come from primarily the two excerpts you’ve taken but the higher students can pull from the entire article to help answer and justify their answers. Everyone feels apart of the discussion and you’ve used one text but easily given everyone something they can handle!
#13: Talking Chips/Colored Cotton Balls
My teachers went CRAZY over this idea when I presented it to them! Talking chips are a great way to hold students accountable. Each student is given a certain number of talking chips and by the end of the given time, the chips must be gone. For each time they contribute to the discussion or answer a question they can put their chip back. The colored cotton balls are a twist on this idea! Give each student the same number of cotton balls, each student a different color. Same rules as above with the talking chips – but with this idea, you can monitor who has been talking more and who needs to contribute more!
#14: Learning Contracts
Learning Contracts are similar to choice boards. The nice thing about a learning contract and the way you can differentiate for your students. On learning contracts you can have different sections of difficulty and then assign the students to do a certain number of questions or problems from each section. So your higher students will have more to do in the harder section but your lower students might have more on the easier side – but both getting exposure both all types of problems. This also allows them to have choice even though they have been told the number of problems in each area to do.
#15: Task Cards
Task cards are very popular right now and can be a very simple way of differentiating. Have a variety of leveled cards for your students to pick from to give them a wide exposure to different questions. OR you can color code the task cards and assign specific students to a specific color of card allowing everyone to participate in the activity at once, but having differentiated problems!
#16: Side by Side Reading
Side by Side reading is very similar to the variety of text levels. The only difference is that you have the texts copied next to one another creating (hopefully) one large text or article for the students to read. Then when you assign the article you are making it look like specific sections are being assigned to specific students when in fact you’re really assigning specific levels to specific students. This idea may take some prep work and some cutting and pasting to create your perfect article. This can work in math to by mixing up the level of problems throughout the page but knowing which problems are which levels when you assign them to students!
#17: Jigsaw Text
If you haven’t done a jigsaw text activity in your class you need to RIGHT NOW! It’s a fantastic activity! Take an article or page and give it to everyone but break it down into manageable sections. Then number your students off into the number of groups that equals the number of sections. (5 sections means 5 people in each group) Have them get into their groups and then have each person take a section of the text. When they know which section that they are responsible for – they then
break out into their ‘specialist’ groups – meaning if I’m in charge of section 1 then I’m going to meet with everyone else in the class that’s also in charge of section one. While in the specialist groups – they read the text or solve the problems and become experts on that section. When time is up – they go back to their original groups and present their findings on their sections. This allows students to focus on small portions of texts or pages but still have collaboration and exposure to the entire text. Jigsaw baby!
#18: Graphic Organizers
G.O’s are one of the most common way to differentiate. Take any concept you’re teaching and find a way to push your higher and assist your lower with the way the G.O. is organized & the types of questions that are on the G.O. Everyone is working on the same topic but being pushed where needed!
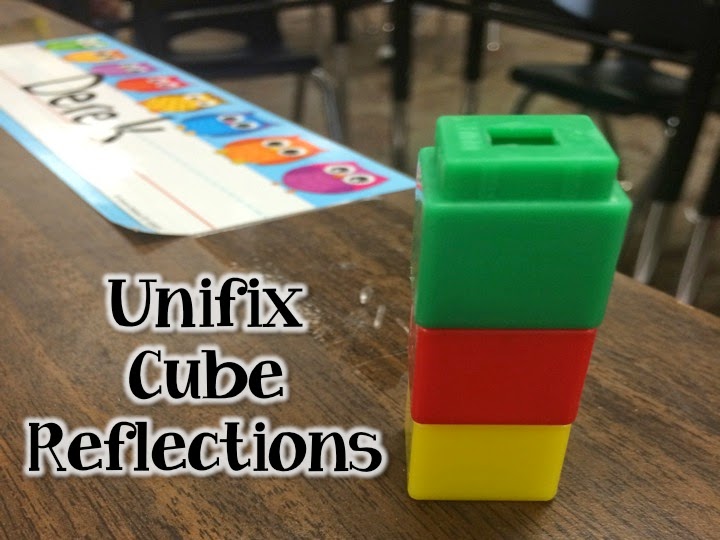
#19: Weather Reports
Also known as checking for understanding, have a specific type of weather report somewhere in the lesson. This can be having a thumbs up or down, a fist or five, or my favorite – using unifix cubes in red, yellow, and green for the students to show me what they are feeling throughout the entire lesson. You can read more about that idea HERE! This can help differentiate by knowing how the students are feeling and getting the concept, which will help with questioning and grouping your students!
#20: Open Ended Exit Tickets
Exit tickets are great, but having something open ended will truly get a feel for what the students are capable of doing and give them a chance to shine. Put a few different questions and give them a choice for which question to solve to make their ownership even more.
Whew! That was a long one, but I hope you got an idea or two out of it. I would LOVE to hear your ideas on whole group differentiation. Please let me know if you have any question about anything. If you’d like to have all of these ideas on one document, you can download that HERE! Happy Teaching!
Do you feel like new terms, trends, and programs are constantly being introduced to teachers? I know I do! Companies and organizations are always creating
I’m a wife, a mommy of 3, blogger, and a full time teacher author and presenter. I love to read, shop, and spend time with my family! My hands are always busy, but my heart is so full!
This website uses cookies to improve your experience. We'll assume you're ok with this, but you can opt-out if you wish. Cookie settingsACCEPT
Privacy & Cookies Policy
Privacy Overview
This website uses cookies to improve your experience while you navigate through the website. Out of these cookies, the cookies that are categorized as necessary are stored on your browser as they are essential for the working of basic functionalities of the website. We also use third-party cookies that help us analyze and understand how you use this website. These cookies will be stored in your browser only with your consent. You also have the option to opt-out of these cookies. But opting out of some of these cookies may have an effect on your browsing experience.
Necessary cookies are absolutely essential for the website to function properly. This category only includes cookies that ensures basic functionalities and security features of the website. These cookies do not store any personal information.
Any cookies that may not be particularly necessary for the website to function and is used specifically to collect user personal data via analytics, ads, other embedded contents are termed as non-necessary cookies. It is mandatory to procure user consent prior to running these cookies on your website.


 If you haven’t done a jigsaw text activity in your class you need to RIGHT NOW! It’s a fantastic activity! Take an article or page and give it to everyone but break it down into manageable sections. Then number your students off into the number of groups that equals the number of sections. (5 sections means 5 people in each group) Have them get into their groups and then have each person take a section of the text. When they know which section that they are responsible for – they then